Sticky Honey Garlic Baked Chicken Drumsticks

There’s something incredibly comforting about the smell of chicken roasting in the oven, especially when it’s coated in a sticky honey garlic glaze. The sweet aroma of warm honey, sizzling garlic, and smoky spices slowly fills the kitchen, making it almost impossible not to peek inside the oven to see how dinner is coming along.
These Sticky Honey Garlic Baked Chicken Drumsticks are the kind of homemade comfort food that makes everyone excited to gather around the table.
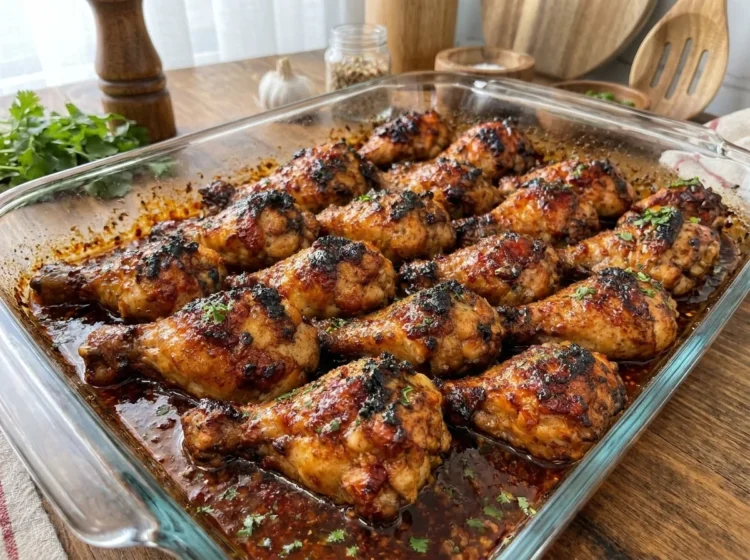
Imagine juicy, tender chicken drumsticks with beautifully golden skin, covered in a glossy sauce that’s sweet, savory, garlicky, and just a little tangy. As the chicken bakes, the honey glaze caramelizes around the edges, creating those delicious sticky spots that make every bite so satisfying.
And the best part? You don’t need complicated ingredients or fancy cooking techniques to make them.
A handful of pantry staples, fresh garlic, honey, and a few simple seasonings come together to create chicken that tastes like something you’d order at your favorite restaurant.
The smoked paprika adds a lovely warmth, the soy sauce brings savory depth, and a splash of lemon juice and apple cider vinegar balances the sweetness of the honey. A little fresh ginger gives the glaze a fragrant finishing touch.
Whether you’re preparing a relaxed Sunday family dinner, hosting friends for a weekend gathering, or simply craving something delicious after a busy day, these honey garlic drumsticks are always a wonderful choice.
They’re easy to prepare, full of flavor, and perfect for serving with all your favorite comforting side dishes.
Ingredients You’ll Need
One of the loveliest things about this recipe is how simple ingredients transform into something so flavorful. The chicken gets a savory spice coating, while the homemade honey garlic glaze creates that beautiful sticky, golden finish.
For the Seasoned Chicken Drumsticks
- 12 chicken drumsticks (approximately 3 lbs / 1.4 kg)
- 2 tablespoons olive oil
- 1 teaspoon smoked paprika
- 1 teaspoon garlic powder
- 1 teaspoon onion powder
- 1 teaspoon dried oregano
- ½ teaspoon salt
- ½ teaspoon freshly ground black pepper
- ½ teaspoon chili flakes (optional)
For the Sticky Honey Garlic Glaze
- ⅓ cup (115 g) honey
- ¼ cup (60 ml) alcohol-free, low-sodium soy sauce
- 4 cloves garlic, finely minced
- 2 tablespoons tomato ketchup
- 1 tablespoon freshly squeezed lemon juice
- 1 tablespoon apple cider vinegar
- 1 tablespoon unsalted butter, melted
- 1 teaspoon freshly grated ginger
- ½ teaspoon smoked paprika
- 1 teaspoon cornstarch mixed with 1 tablespoon water (optional, for thickening)
For Garnishing
- 2 tablespoons fresh parsley, finely chopped
- 1 teaspoon sesame seeds (optional)
How to Make Sticky Honey Garlic Baked Chicken Drumsticks
Making these delicious drumsticks is surprisingly easy. The oven handles most of the cooking, while a few simple steps help create that beautiful caramelized glaze.
The secret is seasoning the chicken well, allowing it to roast uncovered, and brushing on the honey garlic sauce in layers.
Step 1: Preheat the Oven
Start by preheating your oven to 400°F (200°C).
Lightly grease a large 9×13-inch baking dish or line a suitable roasting pan with parchment paper rated for the oven temperature.
If your drumsticks are especially large, use a slightly bigger baking dish so they have enough room to roast evenly.
Giving the chicken a little space helps the skin become golden instead of steaming.
Step 2: Prepare the Chicken Drumsticks
Place the chicken drumsticks on a clean plate or tray.
Using paper towels, pat each piece thoroughly dry.
This small step makes a noticeable difference because removing excess moisture helps the chicken develop a lovely golden surface.
There’s no need to rinse the chicken. Simply dry it carefully and prepare it for seasoning.
Step 3: Season the Chicken Generously
Transfer the drumsticks to a large mixing bowl.
Drizzle with olive oil, then sprinkle over the smoked paprika, garlic powder, onion powder, dried oregano, salt, and black pepper.
If you enjoy a little heat, add the optional chili flakes.
Using a large spoon or clean hands, toss everything together until each drumstick is evenly coated.
The paprika gives the chicken a beautiful warm color, while the garlic and oregano create a wonderfully savory aroma.
Make sure to coat all sides so every bite is full of flavor.
Step 4: Make the Sweet and Savory Honey Garlic Glaze
In a medium mixing bowl, combine the honey, alcohol-free soy sauce, minced garlic, ketchup, lemon juice, apple cider vinegar, melted butter, grated ginger, and smoked paprika.
Whisk until the ingredients are completely blended.
The glaze should look smooth, glossy, and beautifully golden-brown.
The honey provides sweetness, the soy sauce adds a rich savory flavor, and the ketchup gives the sauce a little extra body.
Fresh garlic and ginger bring a warm, fragrant kick, while the lemon juice and vinegar keep the glaze from tasting overly sweet.
Give the sauce a quick taste and adjust the balance if needed.
If you prefer a tangier glaze, add a few extra drops of lemon juice. For a sweeter finish, stir in a little more honey.
Step 5: Arrange the Drumsticks in the Baking Dish
Place the seasoned chicken drumsticks in your prepared baking dish.
Arrange them in a single layer, leaving a little space between each piece.
Try not to stack or overcrowd the chicken.
This allows the hot oven air to circulate and helps each drumstick develop a more evenly golden exterior.
Step 6: Brush on the First Layer of Glaze
Divide the honey garlic glaze between two small bowls.
Use one portion for brushing the raw chicken and keep the second portion completely separate and untouched for later.
Using a pastry brush, coat the drumsticks with the first portion of glaze.
Brush the sauce over the tops and sides, making sure each piece gets a generous coating.
The honey will begin caramelizing as the chicken bakes, giving it that delicious sticky exterior.
Discard any glaze left in the bowl or on the brush that touched raw chicken.
Step 7: Bake the Chicken Until Golden
Place the baking dish in the preheated oven.
Bake uncovered for approximately 25 minutes.
During this time, the chicken will begin to cook through, the skin will turn golden, and the glaze will start developing a beautiful caramelized color.
You’ll notice the wonderful aroma of garlic, honey, and roasted chicken filling the kitchen.
The sauce may bubble gently around the edges of the baking dish, creating a deliciously fragrant coating.
Step 8: Flip and Baste the Drumsticks
After 25 minutes, carefully remove the baking dish from the oven.
Using kitchen tongs, gently turn each drumstick over.
Take a clean pastry brush and coat the chicken with some of the reserved honey garlic glaze.
This second layer builds extra flavor and creates that irresistible sticky, glossy finish.
Be sure to save a little clean glaze for the final coating.
Step 9: Continue Baking Until Juicy and Tender
Return the baking dish to the oven.
Continue baking for approximately 15–20 minutes, depending on the size of the drumsticks.
The chicken should become beautifully golden, with lightly caramelized edges and a rich honey garlic coating.
Use a meat thermometer to check the thickest part of the drumsticks without touching the bone.
The chicken must reach an internal temperature of at least 165°F (74°C).
Drumsticks often become especially tender when cooked a little longer, provided they don’t dry out.
If some pieces finish before others, carefully remove them and allow the larger pieces a few additional minutes.
Step 10: Thicken the Remaining Honey Garlic Glaze
While the chicken finishes baking, pour any remaining clean, reserved glaze into a small saucepan.
Place it over medium-low heat and bring it to a gentle simmer.
If you prefer a thicker sauce, stir together 1 teaspoon of cornstarch and 1 tablespoon of cold water until smooth.
Slowly whisk the mixture into the simmering glaze.
Continue cooking for approximately 2–3 minutes, stirring until the sauce becomes glossy and slightly thickened.
You want a glaze that’s thick enough to cling beautifully to the chicken but still easy to brush or drizzle.
Step 11: Create That Beautiful Caramelized Finish
Once the drumsticks are fully cooked, remove the baking dish from the oven.
Brush the chicken with the thickened honey garlic glaze, giving every piece one final glossy coating.
For a slightly charred, caramelized finish, switch your oven to broil.
Place the chicken under the broiler for approximately 2–3 minutes, watching carefully.
Because honey contains natural sugars, the glaze can burn quickly under high heat.
Keep a close eye on the drumsticks and remove them as soon as the surface develops a beautiful golden-brown shine.
Step 12: Let the Chicken Rest
Remove the baking dish from the oven and allow the drumsticks to rest for approximately 5 minutes.
This short resting time allows the juices to settle and gives the sticky glaze a chance to cling to the chicken.
The drumsticks should look beautifully golden, glossy, and wonderfully appetizing.
Step 13: Garnish with Fresh Herbs
Transfer the chicken drumsticks to a large serving platter or leave them in the baking dish for a cozy family-style presentation.
Sprinkle freshly chopped parsley over the top.
If you enjoy a little extra texture, add a light sprinkle of sesame seeds.
The bright green parsley creates a lovely contrast against the deep golden honey garlic glaze.
Step 14: Serve and Enjoy
Serve the drumsticks warm while the chicken is juicy and the glaze is sticky and flavorful.
They’re especially delicious with fluffy white rice, creamy mashed potatoes, roasted vegetables, or a crisp garden salad.
If you have extra clean, cooked honey garlic glaze, spoon a little over the chicken just before serving.
Every bite brings together tender meat, smoky spices, savory garlic, and a beautifully caramelized honey coating.
It’s the kind of dinner that makes everyone reach for another drumstick!
Presentation: Make Your Honey Garlic Drumsticks Look Beautiful
One of the best things about this recipe is how impressive it looks straight out of the oven.
The rich golden glaze, lightly caramelized edges, and fresh green garnishes create a beautiful presentation that feels both rustic and inviting.
For a family-style dinner, arrange the drumsticks on a large serving platter, slightly overlapping them.
Drizzle a little warm honey garlic glaze over the top, allowing it to run gently between the chicken pieces.
Sprinkle with freshly chopped parsley and a few sesame seeds for a lovely finishing touch.
If you’re serving individual portions, place two drumsticks on each plate beside a generous scoop of fluffy rice or creamy mashed potatoes.
Add a spoonful of roasted carrots, steamed broccoli, or sautéed green beans for a colorful, balanced meal.
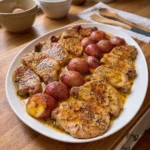
For weekend gatherings, these sticky chicken drumsticks also look wonderful arranged on a large wooden serving board with roasted baby potatoes and fresh herbs.
And don’t forget to put a few extra napkins on the table—these deliciously sticky drumsticks are meant to be enjoyed!
Helpful Tips for the Best Sticky Honey Garlic Chicken
A few simple tricks can make these drumsticks even more flavorful and beautifully caramelized.
- Pat the chicken completely dry: Removing surface moisture helps create a golden exterior.
- Bake the chicken uncovered: This allows the skin to roast instead of steaming.
- Don’t overcrowd the baking dish: Leaving space between the drumsticks encourages more even browning.
- Brush the glaze on in layers: Adding the sauce gradually creates a rich, glossy coating without exposing all the honey to high heat for too long.
- Reserve clean glaze separately: Keep any sauce used on raw chicken away from the portion you’ll use for finishing.
- Use a meat thermometer: Drumsticks should reach at least 165°F (74°C) before serving.
- Watch carefully when broiling: The honey glaze caramelizes quickly and can burn if left unattended.
- Let the chicken rest: A few minutes of resting helps the meat stay juicy and allows the glaze to settle.
Chef’s Special Tip
For that beautiful, sticky, deeply golden coating, don’t pour all the honey garlic glaze over the chicken at once.
Instead, brush it on in stages.
Start with a light coating before baking, add another layer halfway through cooking, and finish with a final brush of thickened glaze just before broiling.
This helps build rich flavor and a glossy, caramelized surface without letting the honey burn too early.
For an extra fragrant finish, sprinkle a tiny amount of freshly grated ginger over the cooked drumsticks along with the parsley.
Cooking Time & Nutritional Information
| Details | Amount |
|---|---|
| 🕒 Preparation Time | 15 minutes |
| 🍳 Cooking Time | 50 minutes |
| ⏱️ Total Time (Including Resting) | 1 hour 10 minutes |
| 🔥 Estimated Calories | Approximately 420 kcal per serving |
| 🍽️ Servings | 6 servings (2 drumsticks each) |
Nutrition is approximate and may vary depending on the size of the drumsticks, whether the skin is eaten, ingredient brands, and how much glaze is consumed. Side dishes are not included.
How to Store and Reheat Leftovers
If you’re lucky enough to have leftovers, these honey garlic drumsticks are just as delicious the next day.
Allow the chicken to cool slightly, then transfer it to an airtight container.
Refrigerate within two hours of cooking.
Properly stored cooked chicken can be enjoyed within 3–4 days.
For reheating, arrange the drumsticks in an oven-safe dish and cover loosely with aluminum foil.
Warm in a 325°F (165°C) oven until the thickest part reaches an internal temperature of 165°F (74°C).
If you’d like to bring back the sticky, caramelized exterior, remove the foil during the final few minutes and brush with a little extra prepared glaze.
Keep a close eye on the chicken so the honey doesn’t burn.
Leftover drumsticks are also wonderful served with rice, roasted potatoes, or a simple vegetable salad.
Can You Prepare These Drumsticks Ahead of Time?
Absolutely!
This recipe is a great choice when you’re planning a family dinner or gathering.
You can season the chicken drumsticks several hours in advance and keep them covered in the refrigerator.
The honey garlic glaze can also be prepared ahead and stored separately in an airtight container.
When you’re ready to cook, simply arrange the seasoned drumsticks in the baking dish, brush with glaze, and bake as directed.
This makes dinner preparation wonderfully easy, especially on busy evenings.
Conclusion: A Sticky, Golden Chicken Dinner Worth Making Again
Some recipes have a special way of making everyone excited for dinner, and these Sticky Honey Garlic Baked Chicken Drumsticks are definitely one of them.
From the tender, juicy chicken to the rich honey garlic glaze and beautifully caramelized edges, every bite is filled with comforting homemade flavor.
The sweetness of the honey, the savory depth of the soy sauce, the warmth of fresh garlic and ginger, and the gentle smokiness of paprika come together in a way that’s wonderfully satisfying.
It’s the kind of dish that’s simple enough for an ordinary weeknight but delicious enough to serve at a family gathering or weekend celebration.
And there’s something especially lovely about bringing a platter of golden, glossy chicken drumsticks to the table and watching everyone reach for their favorite piece.
Whether you serve them with creamy mashed potatoes, fluffy rice, or a colorful plate of roasted vegetables, these drumsticks are sure to become a family favorite.
So the next time you’re craving a delicious homemade chicken dinner, grab a little honey, some fresh garlic, and your favorite baking dish.
Because sometimes, the most unforgettable meals are made with simple ingredients, a sweet and sticky glaze, and plenty of love. 🍯🍗🧄❤️